The SPF checker does two jobs: it looks up your domain's existing SPF record and explains it, and it builds a correct record for you from a few clicks. This visual walkthrough covers both, using example.com as the example.
Step 1 — Enter a domain and check
Go to the SPF checker, type a domain into the box, and press Check SPF. The lookup runs live against the domain's real DNS.

Step 2 — Read your SPF result
The result shows whether an SPF record exists and breaks it down:
- 1The published SPF record, exactly as it appears in DNS.
- 2The DNS lookup count — SPF allows a maximum of 10. Go over and SPF silently fails, so this gauge is the single most useful number on the page.
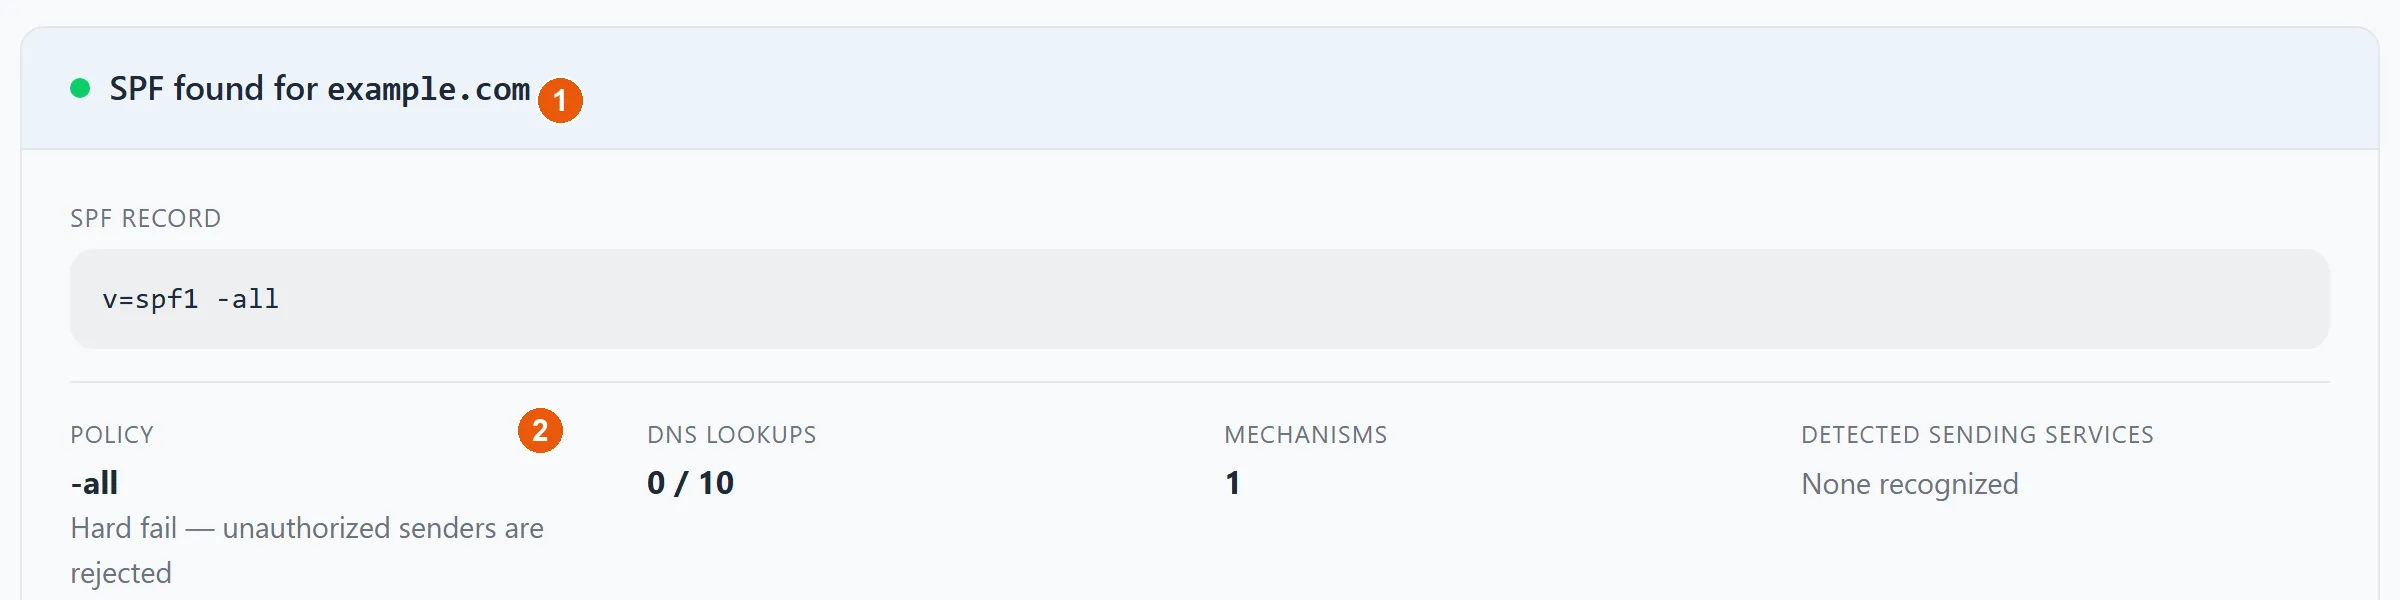
For what every mechanism and qualifier means, see SPF records explained.
Step 3 — Build a valid SPF record
Don't have a record yet, or need to fix one? Use the Generate an SPF record builder — no syntax knowledge required:
- 1Pick your primary mail provider (Google Workspace, Microsoft 365, Zoho, and so on).
- 2Tick any additional sending services you use — Mailchimp, SendGrid, Amazon SES, and the like.
- 3Choose your policy for everything else —
~all(soft fail) is the safe starting point; tighten to-allonce you're sure every sender is listed. - 4Click Generate SPF record and copy the result into a single TXT record at your domain's root.
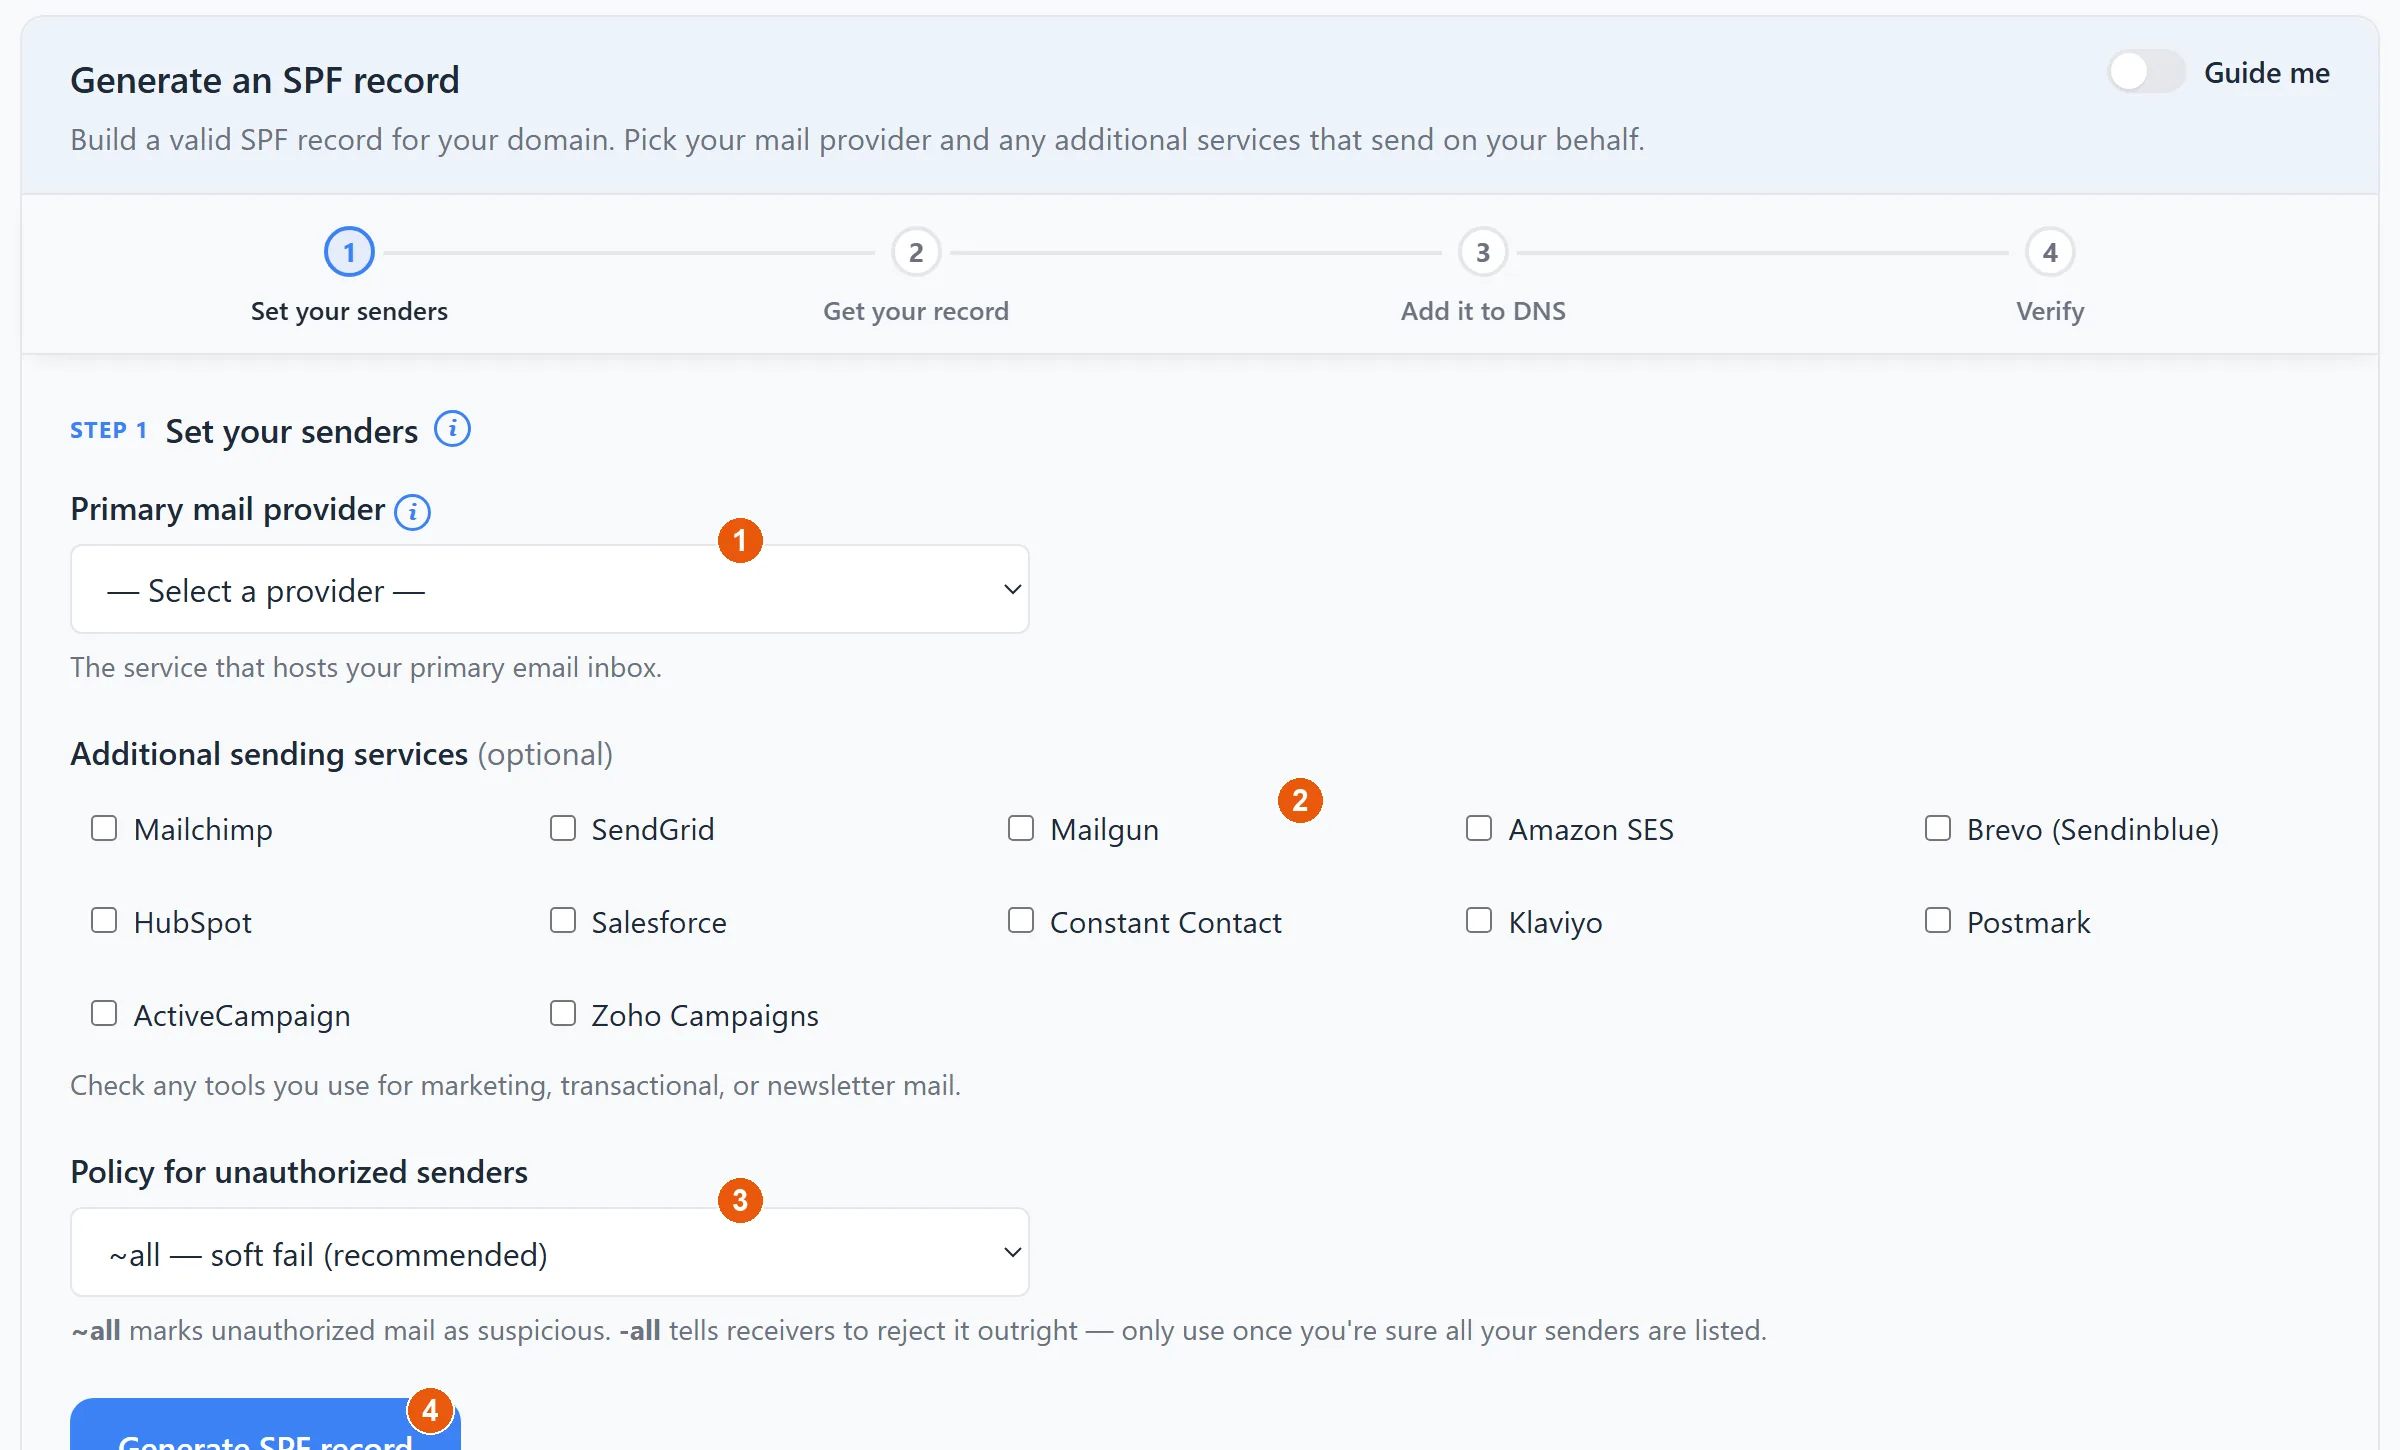
Remember: a domain may have only one SPF record, so if you already have one, merge the new services into it rather than adding a second.